How to Keep Your Tile Floors Looking Great

You can keep your tile floors looking great with periodic maintenance proper care. The advantage of tile floors is that they are easy to clean up and look awesome. Hence, they are a fine choice for homeowners.

Tile floors have a surface that is normally more impervious to dirt, debris and grease than wood floors. However, you will have to clean them up regularly to keep dust and debris from getting embedded in the surface, which can make them look dull. Regular tile floor maintenance can help you do that.

Tile Floor Maintenance

Keep Your Tile Floor Looking Great

One of the most important factors that can keep your tiles looking great is cleaning up any dirt or debris before it has a chance to take hold within the tile surface. Whenever there is a spill or your tiles get dirty for any reason, you should not wait. The longer you wait, the more time the dirt has to get firmly entrenched in the tile floor. Cleaning up such spills may require far more elbow grease and hard work later on.

As soon as there is any spill or dirty spot on your tiles, you should bring out the mop, a bucket of water, and some detergent to clean it up. You should test the detergent on a small inconspicuous spot to ensure that it will not damage the tile.

Regular Cleanup

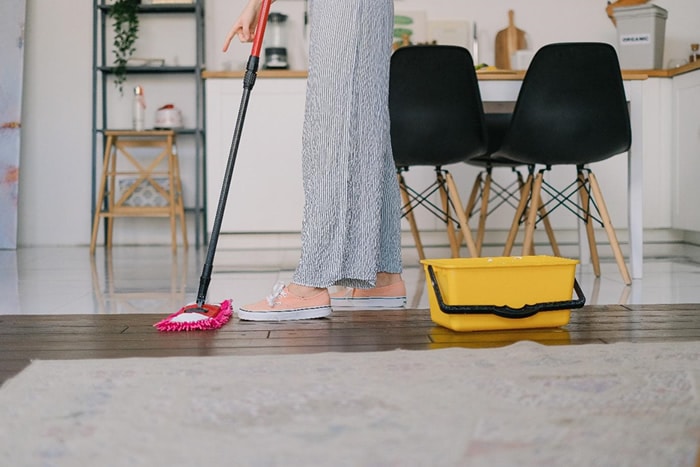
Regular maintenance and cleaning will keep your tile floor pristine for a long time to come. Sweep, vacuum, and use a damp mop for cleaning up tile floors in your kitchen, bathroom, living space, and any other place in your house.

When you vacuum and sweep your tile floors daily, dirt will have fewer chances for settling and embedding deeply in the tile surface. A wet mop can help you to take out residual dust that may be left behind by the vacuum or broom.

You may also want to use cleaning products that your manufacturer has recommended for cleaning up your tile floor. Such products can help to maintain the luster, gloss and brilliance of your beautiful tile floor.

Do remember, though, that one of the best and safest cleaning liquids for your tile floor is good old-fashioned water.

Tile Floor Cleaning Caution

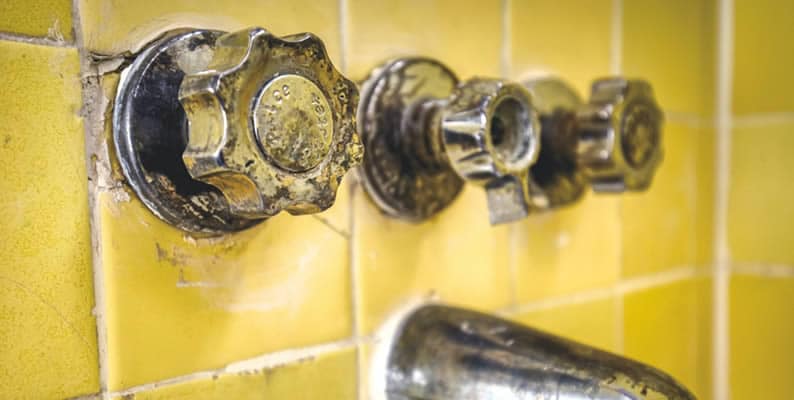
Although you might find tile cleaning techniques on the internet, you should be very cautious and skeptical of these methods since they employ harsh chemicals that may do a number to your beautiful tiles. You may find tile cleaning tips that involve the use of bleach and/or vinegar. A much safer option for your tiles is to contact a professional with years of experience and dedication to their credit.

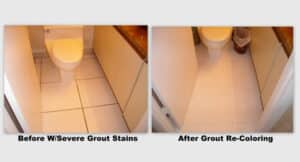
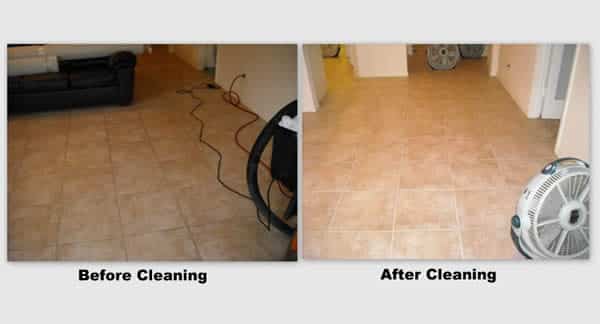
Professional tile cleaning assistance can help your aging tile floor look as good as new. In particular, the professional can take care of grout that is often very hard to clean up.

You may be surprised at how great your tile floor looks when professionals clean up the tiles and grout. You will hardly be able to recognize your tile floor.

Interested in professional assistance to keep your tile floor looking great and as good as new?

CONTACT US FOR A FREE ESTIMATE »

Can You Put New Grout on Top of Old Grout?

Wondering if it’s possible to put new grout on top of old grout? Yes, absolutely.

But is it the right thing to do? Probably not.

Let’s dive right in to discover why regrouting is necessary and what’s the best way to do it.

Regrout to Give Your Space a Whole New Look

No matter how well you’d sealed your grout, you may notice it cracking, separating, or crumbling after some time. Grout is porous and can absorb liquid and contaminants that may cause it to degrade. In addition to making your tiles unsightly, grungy grout can result in serious problems if you don’t do anything about the water sinking between the joints of the tiles.

new grout on top of old grout

If you spot cracks, stains, or mold, it’s time to regrout your tile surfaces! A new application of grout won’t only make your tiles look cleaner but also more resistant to water and impurities.   

So Is It Okay to Put New Grout on Top of Old Grout?

When it comes to regrouting, the first thing to come to your mind may be to apply a new layer of grout over the old layer. Below are a couple of reasons you shouldn’t do this.

  • Regrouting over existing grout means the new mixture may not properly adhere to the tile edges, exposing the material to water and potentially harmful substances. Even if you plan to add grout just where it has cracked or separated, it’ll likely break away after some time and you’ll be back at square one.
  • Applying grout over existing grout doesn’t look appealing. You may still see the old layer of grout below the new layer. Besides, if you want to treat only a few areas, you’ll easily notice a difference between the regrouted and untreated surfaces.   

What’s the Best Way to Refresh Your Grout?

While it’s not a good idea to grout over top of existing grout, you don’t necessarily have to remove all the grout either. Complete replacement of the grout can be costly and time-consuming and is often unrequired.

What’s important is to wipe and chip the dirty, cracked grout so that the new layer can adhere well. While at it, look for any problems that may have caused the grout to get dirty and moldy. Make sure you address these issues before laying down the fresh layer of grout.

Here are the steps you need to follow when regrouting.

  1. Scrape all the bits of old grout before you begin
  2. You can use a vacuum to ensure the surface is thoroughly cleaned
  3. Wash the floor or walls to remove dirt
  4. Mix the grout as per the instructions and use a grout float to spread it evenly into all the joints
  5. Wash the area with a damp sponge and smoothen the joints
  6. Allow the grout to dry before rewashing the surface
  7. Use a clean, dry towel to buff it and let it sit for a week before sealing

Alternatively, you can call tile and grout cleaning specialists at My Dirty Grout and put the hard work on auto-pilot. For tile and grout cleaning, restoration, and sealing services, get in touch with us.  

Does Sealant Damage Grout?

Some Sealants Can Cause Damage to Grout

When it comes to maintaining tile floors, applying a sealant to grout is often recommended to protect against stains, dirt, and moisture. However, there are concerns about whether sealants can cause damage to grout over time. Understanding the potential risks and benefits of using sealants on grout can help you make an informed decision for your flooring needs.

does sealant damage grout

Benefits of Using Sealant on Grout

Sealants create a protective barrier on the surface of grout, preventing water, dirt, and other contaminants from penetrating the porous material. This can significantly reduce the likelihood of mold and mildew growth, as well as make cleaning easier. Sealants can also enhance the appearance of grout, giving it a polished look and helping to maintain its color over time.

Potential Risks of Using Sealant on Grout

While sealants offer many benefits, there are potential risks to consider. One common concern is that sealants can trap moisture within the grout, leading to long-term damage. If water gets beneath the tiles and seeps into the grout, it can become trapped and cause the grout to crack or deteriorate over time. This is especially true in areas with high humidity or frequent exposure to water, such as bathrooms and kitchens.

Another risk is that improperly applied sealants can cause discoloration or uneven application, which can be difficult to correct. Using the wrong type of sealant for your specific grout can also lead to issues, as different types of grout may require different sealants for optimal protection.

Choosing the Right Sealant

To minimize the risks associated with using sealants on grout, it’s essential to choose the right product for your specific needs. Consult with a professional tile cleaning company, such as My Dirty Grout in Cape Coral, FL, to determine the best type of sealant for your grout. They can provide expert advice and ensure that the sealant is applied correctly to avoid potential damage.

Maintenance and Reapplication

Sealants are not a one-time solution; they require regular maintenance and reapplication to remain effective. Over time, the protective barrier created by the sealant can wear off, necessitating reapplication to maintain its benefits. It’s important to follow the manufacturer’s guidelines for resealing and to schedule regular inspections to ensure the grout remains protected.

Conclusion

While sealants can offer significant benefits in protecting and enhancing grout, it’s crucial to be aware of the potential risks and take appropriate precautions. By choosing the right sealant, applying it correctly, and maintaining it regularly, you can enjoy the benefits of a protected and beautiful tile floor. For professional advice and services, reach out to My Dirty Grout in Cape Coral, FL, at (941) 457-4197. Their experienced team can help you make the best decision for your flooring needs.

This blog provides a comprehensive overview of the benefits and potential risks of using sealants on grout, helping homeowners make informed decisions for their tile flooring maintenance. If you have any further questions or require assistance, feel free to reach out!

Does Flooding Damage Tile Floors?

Does Flooding Damage Tile Floors?

Flooding can wreak havoc on homes, and tile floors are not immune to its effects. While tiles are generally more resilient than other flooring types, they can still suffer damage when exposed to floodwaters. Understanding the potential impact of flooding on tile floors and how to address it is crucial for homeowners.

does flooding damage tile

Immediate Effects of Flooding on Tile Floors

When floodwaters inundate a home, they bring with them dirt, debris, and potentially harmful contaminants. These elements can seep into the grout lines and even beneath the tiles, causing a range of issues. One of the most immediate concerns is the potential for mold and mildew growth. The moisture trapped beneath the tiles creates an ideal environment for these fungi to thrive, which can lead to health problems and further damage to the flooring.

Another common problem is efflorescence, a white, powdery residue that forms on the surface of tiles when water evaporates, leaving behind mineral salts. While efflorescence can be cleaned off, it often reappears until all residual moisture has dried, which can take days or even weeks. In more severe cases, sub-florescence can occur, where mineral salts crystallize just below the surface, causing internal stress and potentially leading to spalling, where small pits form in the stone.

Long-Term Effects of Flooding on Tile Floors

Over time, floodwaters can cause discoloration and staining, especially in light-colored tiles that contain iron deposits. When exposed to water, these iron deposits can oxidize, resulting in yellowing or browning of the tiles. In some cases, the damage may not be immediately apparent and can take months to become visible.

Additionally, standing water can damage the grout between the tiles, loosening tile adhesive and saturating the subfloor. The subfloor, often made of particle board or plywood, can absorb the water and expand, causing the tile floor to buckle or tiles to become loose. This damage may not become evident for several weeks or months after the floodwaters have subsided.

Addressing Flood Damage to Tile Floors

To address these issues, it is essential to act quickly. Begin by removing standing water and thoroughly drying the area. Use fans and dehumidifiers to increase air circulation and speed up the drying process. Once the tiles are dry, clean the grout lines and the surface of the tiles to remove any dirt, debris, and contaminants. If efflorescence or staining is present, a professional cleaning service, such as My Dirty Grout in Cape Coral, FL, can help restore your tiles to their original condition. Contact them at (941) 457-4197 for expert advice and services.

In some cases, the damage may be too extensive, and replacement of the affected tiles or grout may be necessary. Consulting with a professional can help determine the best course of action and ensure that your tile floors are restored to their former beauty.

Preventive Measures

To minimize the impact of future flooding, consider applying a sealant to your tile floors. Sealants create a protective barrier that helps prevent water from penetrating the tiles and grout. Regular maintenance, including cleaning and resealing, can also help extend the lifespan of your tile floors and keep them looking their best.

By understanding the potential effects of flooding on tile floors and taking prompt action, homeowners can mitigate damage and restore their homes effectively. For professional tile and grout cleaning and sealing services, reach out to My Dirty Grout in Cape Coral, FL, and let their experienced team help you bring your tile floors back to life.

This blog provides a comprehensive overview of how flooding can damage tile floors and offers practical advice for addressing and preventing such damage. If you have any further questions or require assistance, feel free to reach out!

How Often Should I Clean My Tile and Grout

Tile & Grout Cleaning Frequency

If you have tile and grout in your home, you may be wondering how often you should clean it to keep it looking fresh and new. The answer may vary depending on factors such as foot traffic, pets, and type of tile. However, a general rule of thumb is to clean your tile and grout at least once every 6-12 months.

grout cleaning frequency

Cleaning your tile and grout regularly not only helps maintain the beauty of your floors but also prolongs their lifespan. Over time, dirt, grime, and bacteria can build up in the pores of your grout lines, causing discoloration and even mold growth if left untreated.

My Dirty Grout

One company that specializes in professional tile and grout cleaning is My Dirty Grout. They serve Lee and Charlotte Counties, providing top-notch services to ensure that your floors look brand new again. Their website at https://www.mydirtygrout.com showcases before-and-after photos that demonstrate the effectiveness of their cleaning process.

My Dirty Grout can be reached at (941) 457-4197 for a free estimate on their services. Whether you have ceramic, porcelain, or natural stone tiles, they have the expertise to clean them thoroughly without causing any damage.

So if you’re looking to refresh the look of your tile and grout floors, consider contacting My Dirty Grout for professional cleaning services. With regular maintenance from experts like them, you can enjoy beautiful floors for years to come.

What Are Natural Ways to Clean Tile Floors?

Eco Friendly Tile Cleaning

natural ways to clean tile

Tile and grout are common features in most homes, adding both aesthetics and functionality to the space. However, over time, these surfaces can become dirty and dull due to foot traffic, spills, and other factors. Regular maintenance is necessary to keep your tile and grout looking clean and shiny. While there are many commercial cleaning products available in the market, they often contain harsh chemicals that can be harmful to you and your family’s health.

If you’re looking for natural ways to clean your tile and grout without using chemical-laden products, look no further than Dirty Grout. A professional cleaning company serving Port Charlotte, Fort Myers, Cape Coral, Bonita Springs (and all surrounding areas), Dirty Grout specializes in removing dirt, bacteria, mold, and stains from tile surfaces using eco-friendly methods.

Here are some natural ways recommended by the experts at Dirty Grout to help you achieve a spotless tile surface:

  1. Baking Soda
    Baking soda is not only a staple ingredient in every household but also an excellent cleaner for tiles. Its abrasive nature makes it perfect for removing tough stains on tiles while being gentle enough not to damage them. Mix equal parts of baking soda with warm water until you get a paste-like consistency. Apply it on the affected area using a scrub brush or toothbrush for grout lines. Let it sit for 10-15 minutes before scrubbing again with warm water and then wiping it off.
  2. Vinegar
    Vinegar has strong acidic properties that make it an effective cleaning agent against grease build-up on tiled surfaces like kitchen backsplashes or bathrooms walls. You can mix one-part vinegar with two parts of water in a spray bottle; spray it onto the desired area; let it sit for 5-10 minutes before wiping away with a damp cloth or sponge.
  • 3. Understanding Teas TREE Oil Trisodium Phosphate(TSP)
    Treating tile and grout with tea tree oil is a natural way to clean and disinfect the surface. Tea tree oil has antibacterial and antifungal properties that can effectively kill germs and mildew on your tiles. Mix 5-10 drops of tea tree oil with water in a spray bottle, generously spray onto the affected surface, let it sit for 10-15 minutes, then scrub and rinse with warm water.
  1. Lemon Juice
    Lemons are well-known for their natural cleaning abilities due to their high acidity levels. They work great in removing stubborn stains such as rust or hard water deposits on tiles or grout lines. Cut a lemon in half, dip it in salt (for added abrasiveness), then scrub the area until the stain disappears. Rinse off with warm water afterwards.
  • 5. Trisodium Phosphate(TSP)
    TSP is known for its strong cleaning capabilities when dealing with tough stains on non-porous surfaces like tile and grout. It’s important to note that TSP should be handled carefully using gloves as it can irritate skin on contact. Mix one tablespoon of TSP with three tablespoons of warm water; apply this solution onto the desired area using a sponge or cloth, scrub gently before rinsing off thoroughly.

In addition to these natural methods mentioned above, Dirty Grout also recommends regular sweeping or vacuuming of tiled floors to prevent dirt from settling into the grout lines.

However, if you’re facing more stubborn stains or want professional help in making your tiled surfaces look like new again, contact Dirty Grout at (941) 457-4197 for an eco-friendly deep cleaning service at an affordable price point.

To sum it up, keeping your tile and grout clean doesn’t have to involve harsh chemicals that can be harmful to you and your family’s health. By using some kitchen staples like baking soda or vinegar along with natural cleaning products such as tea tree oil and TSP, you can achieve a sparkling clean tile and grout surface without compromising on your health. And for more stubborn stains or deep cleaning needs, don’t hesitate to call Dirty Grout – the experts in eco-friendly tile and grout cleaning.

5 Tips To Protecting Your Tile Floors

Protecting Your Tile Floors

Tile floors are a popular choice for many homeowners because of their beauty, durability, and ease of maintenance. But, like any flooring material, tile floors need to be cared for properly in order to keep them looking their best.

protecting your tile floors

Here are 5 tips to help you protect your tile floors:

1. Regularly sweep and mop your tile floors. Regular sweeping and mopping can help keep dirt and debris from accumulating on your tile floors, which can cause scratching and staining. Be sure to use a mild cleaning solution and a soft mop or brush to avoid damaging your tile floor.

2. Place area rugs in high-traffic areas. Area rugs can help protect your tile floors from scratches and wear and tear. Place area rugs in entryways, hallways, and other high-traffic areas of your home.

3. Use furniture protectors. Furniture protectors are small pieces of plastic or rubber that you can place under furniture legs to protect your tile floors from scratches and other damage.

4. Invest in tile sealant. Tile sealant can help in protecting your tile floors from moisture, stains, and dirt. Be sure to reapply the sealant every few years to ensure your tile floors are properly protected.

5. Clean up spills immediately. Spills can cause staining and damage to your tile floors, so it’s important to clean them up immediately. Use a damp cloth or paper towel to wipe up spills as soon as they occur. Following these tips can help you protect your tile floors and keep them looking their best for years to come.

If you want to refresh the look of your floors and make them look nearly new again, contact My Dirty Grout for a quote to clean and color seal your grout.

Why Does My Mop Leave Streaks on Tile?

There’s nothing more annoying than spending hours mopping a tiled floor only for it to have streaks afterward. The main reason there are streaks after mopping is residual dirt and dust. Moreover, an incorrect mopping technique also ruins the appearance of your floor.

Surprisingly, tile cleaning is trickier than some other cleaning tasks. To maintain your flooring, you must keep mob them correctly to avoid streaks and scratches.

mop leaves streaks on tile

Read on to find the best techniques for mopping to avoid streaking on tiled floors.

Techniques To Avoid Streaks on Tile

Here is a list of all the steps you need to follow to get streak-free floors:

Step 1

Take a hard floor attachment of a vacuum cleaner or a broom and sweep the floor thoroughly. Remove any traces of dirt and dust with more focus around the edges.

Step 2

Depending on the type of flooring material, choose a suitable cleaning agent. For linoleum and rubber tiles, use a mild cleaning agent.

For brick, ceramic, or stone, consider using a mix of hot water and vinegar. Vegetable oil and vinegar are excellent options for wooden tiles. You can also use a commercial-grade floor cleaner for other material types.

Once you have selected the cleaning agent, dip your mop and squeeze it out till all the excess liquid is removed. Start mopping the floor with the damp mop. You can also spray the solution directly onto the floor and mop on top of it.

Step 3

Replace the cleaning solution as soon as it starts to look dirty. If you continue using the dirty solution, it will cause streaks after mopping.

Step 4

Once you’re done, mop the floor once again but use clean water this time. It will remove any cleaning agent residue, leaving your floor sparkly clean. But if you have wooden floors, you can skip this step.

Step 5

After mopping the floor with clear water, dry it with a towel. Don’t wait for the floor to dry on its own, as it can leave marks.

If you’re working in a large space, consider mopping in sections. After mopping each section, dry it completely with a towel before moving to the next portion.

Hire a Professional

If you want to avoid the hassle of cleaning floors vigorously every time, consider getting them cleaned by professionals. A professional cleaning company will have all the equipment and supplies needed for the best results.

Dirty Grout is one of the best grout and tile cleaning companies that offer commercial and residential services. Get in touch today by calling us at (941) 457-4197 to get a free quote.

Fix Water Seeping Through Grout in Shower

Shower leakages aren’t an uncommon occurrence. Improper grout application leads to water seeping through grout in areas that use water, such as your kitchen or bathroom. When it comes to bathrooms, your shower area is the most susceptible to grout failure.

What Causes Water Seeping Through Grout?

If your grout is cracking or applied unevenly, you’ll end up with water seeping through the tiles. Water seepage is most a result of unsealed grout.

Unsealed grout will lead to stagnant water, which ultimately causes the growth of mold and mildew between your tiles. This affects the overall appearance of your tiles, and in cases of severe damage, you might have to replace your tiles entirely.

fix water seeping through grout

How to Fix Water Seeping Through Your Shower?

A simple solution to prevent water seepage through your tiles is grout sealing. Unsealed grout can get dirty quite quickly, and with continuous use of water, it can damage your tiles.

But grout sealing will make your tiles waterproof and also enhance the overall appearance of your bathroom. When your tiles are waterproof, it automatically prevents water seepage. As a result, protecting them from severe water damage.

How Long Does Grout Sealing Last?

Grout sealing lasts for a maximum of two years. You’ll have to get your grout resealed every 1-2 years to maintain them and prevent water seepage.

DIY vs. Professional Grout Sealing

Grout sealing seems like a relatively simple task and many people consider taking it on as a DIY project. While that may seem like a cost-effective option, it can end up costing you more in the long run. In addition, grout cleaning needs to be done correctly for it to be effective. For that, you’ll need to use proper equipment and sealants.

It’s better to get professional grout sealing done to prevent water seepage. A job done by a professional will give better and long-lasting results. Plus, professional grout sealing is relatively inexpensive. Furthermore, by investing in it, you’ll be able to save yourself the trouble of getting your tiles replaced because of water seepage.

Hire Help

While plenty of companies would take on a grout sealing project, it’s important to hire help from a reliable contractor.

We recommend trying out Dirty Grout to get your grout sealed. We offer odorless grout sealing at affordable rates. Their team of experts has been in the grout sealing business for years and knows how to produce long-lasting results.

Final Thoughts

Grout sealing is an easy solution to fix water seeping in your shower area. It’s better to get your grout sealed by a professional. To keep your tiles in top condition and prevent water damage, be sure to get your grout resealed regularly.

Why Is My Grout Crumbling?

Grout is used as glue to hold your tiles in place. But these days, grout does more than just keep your tiles together; it is also used to enhance the aesthetic appeal of your home. That’s why dirty or untidy grout can affect the whole appearance of your home. Moreover, grout crumbling is quite common, especially in the bathroom and kitchen.

crumbling grout lines

What Causes Grout Crumbling?

Multiple factors lead to grout crumbling. Let’s look at some of the most common causes of grout crumbling:

Low-Quality Grout

The use of low-quality grout is the main culprit which causes your grout to crumble away. Mostly, grout is cement-based. While it may be an affordable option, it becomes susceptible to damage in the long run because cement is naturally porous. Porous materials tend to absorb dirt, dust, and grime, which causes staining and makes grout crumble.

High Moisture Content

Moisture is the natural enemy of grout and one of the main causes of grout crumbling. Areas with high moisture content like the kitchen and bathroom easily become damaged and resulting in grout crumbling.

Use of Harsh Cleaning Agents

Sometimes using harsh cleaning agents can cause damage to your grout. Moreover, some of the chemicals are strong enough to even dissolve grout seals. It is important to use mild cleaning agents to clean grout.

How to Prevent Grout Crumbling?

The three major causes of grout crumbling are low-quality grout, high moisture content, and the use of harsh cleaning agents. To avoid damage to grout, you can switch to using safer cleaning agents, but the one thing that will solve all your grout problems is grout sealing.

When you get your grout sealed, it will protect your grout from dirt, dust, and debris. Moreover, your tiles and grout will become waterproof. You won’t have to worry about getting water damage or the growth of mold or mildew on your grout.

A well-sealed grout will last longer, and regular cleaning won’t affect the seal as much, but still, you should try to use mild cleaning agents.

Get Professional Help

While you can always seal grout in a DIY project, it is best to get it done by professionals for the best results. If you want a long-lasting job that prevents grout from crumbling, let the professionals take over. But keep in mind that grout sealing should be done after every 1-2 years to ensure your grout stays protected.

If you don’t know any grout sealing companies, we recommend trying out Dirty Grout. They have the best grout services that you can get at affordable prices. You can visit their website for further details.