5 Tips To Protecting Your Tile Floors

Protecting Your Tile Floors

Tile floors are a popular choice for many homeowners because of their beauty, durability, and ease of maintenance. But, like any flooring material, tile floors need to be cared for properly in order to keep them looking their best.

protecting your tile floors

Here are 5 tips to help you protect your tile floors:

1. Regularly sweep and mop your tile floors. Regular sweeping and mopping can help keep dirt and debris from accumulating on your tile floors, which can cause scratching and staining. Be sure to use a mild cleaning solution and a soft mop or brush to avoid damaging your tile floor.

2. Place area rugs in high-traffic areas. Area rugs can help protect your tile floors from scratches and wear and tear. Place area rugs in entryways, hallways, and other high-traffic areas of your home.

3. Use furniture protectors. Furniture protectors are small pieces of plastic or rubber that you can place under furniture legs to protect your tile floors from scratches and other damage.

4. Invest in tile sealant. Tile sealant can help in protecting your tile floors from moisture, stains, and dirt. Be sure to reapply the sealant every few years to ensure your tile floors are properly protected.

5. Clean up spills immediately. Spills can cause staining and damage to your tile floors, so it’s important to clean them up immediately. Use a damp cloth or paper towel to wipe up spills as soon as they occur. Following these tips can help you protect your tile floors and keep them looking their best for years to come.

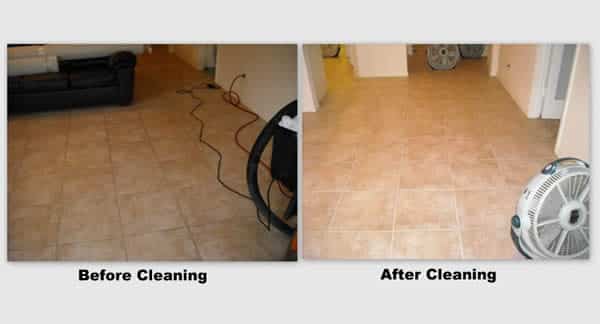
If you want to refresh the look of your floors and make them look nearly new again, contact My Dirty Grout for a quote to clean and color seal your grout.

The Best Cleaning Solution for Ceramic Tile

Tile Cleaning Solution

Ceramic tile is a beautiful, long-lasting option for floors and countertops. But it can be challenging to keep clean! Read on if you’re looking for the best cleaning solution for your ceramic tile.

cleaning solution for tile

●    Vinegar And Water.

Vinegar is a natural cleaner and mild acid, which means it can be used to clean tile grout. It’s also a mild abrasive to remove soap scum, mineral deposits, and mildew stains.

●    Vinegar And Salt.

Vinegar and salt make for a good cleaning solution for ceramic tiles.

Vinegar and salt is a natural, eco-friendly cleaning solution that can be used on all types of ceramic tile, including marble, limestone, travertine, slate, granite, and more. It’s also an excellent way to remove stains from ceramic tile.

Vinegar and salt help loosen dirt on surfaces so it can be wiped away easily with a damp cloth or sponge. The best part is that it’s easy on your hands because there are no harsh chemicals involved! If you have hard water stains in your tub/shower area, try adding some dishwashing liquid, too, as this will help dissolve soap scum faster than just using vinegar alone.

●    Vinegar And Baking Soda.

Vinegar is a natural disinfectant that can be used to clean ceramic tiles. Mix white vinegar and water in a spray bottle to clean your tile with vinegar. The ratio of 1:3 will give you a cleaning solution that is safe to use on most surfaces while still being strong enough to remove stains. On average, each room of tile will require about one cup of this mixture; however, this depends on how much grime is present in the area you wish to clean.

For best results, apply the cleaning solution directly onto the stained areas and scrub with a sponge until all dirt has been removed from the surface of the tiles (approximately 30 seconds). Rinse thoroughly with warm water after using soap or detergent products!

●    Vinegar And Hydrogen Peroxide.

This is a popular choice, and it’s probably the safest option. It’s also easy to find—you can buy vinegar and hydrogen peroxide in any grocery store or pharmacy. Ideally, you’ll want to use a 1:1 solution of each (about a cup of each), mix them in a spray bottle, and then apply them to your tile floors with a scrubbing pad.

This combination works well on grout lines but not on large surfaces like shower walls or tubs because it requires several applications over several days before the stains are removed completely.

Caution:

  • Don’t use this mixture on marble, granite, or other natural stone.
  • Don’t use it if you have unsealed tile.
  • Never use this mixture on glazed tiles
  • Don’t try this method at all if you have rubber-backed mats under your linoleum runners (it will eat through them within minutes).

●    Dish Soap and Water.

Dish soap is a mild detergent that can be used to clean tiles. Use a scrub brush to clean grout lines in your ceramic tiles and any dirt or stains you find on the surface of your ceramic floor tiles. Dish soap is more effective at removing grease than natural soaps, but it may not work as well with other types of stains or dirt buildup.

When using dish-soap mixed with water for cleaning, you should also consider what type of finish your ceramic floor has before deciding how much to use in the mixture. If you have a slippery glaze on top of your tile’s finish—which gives it its shine and color—you will want to dilute the dish soap more than if there were no finish applied.

●    Water And Baking Soda Or Cornstarch.

There are several options if you’re looking to clean your tile with a homemade solution. One option is to use a 1:1 ratio of water and baking soda. This can be used in place of commercial cleaners, and the results will be similar. Another option is to use a 1:3 ratio of water and cornstarch, which can work well as an alternative cleaning solution instead of commercial products.

To apply the mixture:

  • Mix one part baking soda or cornstarch with three parts water until dissolved
  • Place on the affected area using a spray bottle or mop
  • Let sit for 30 minutes (or up to 3 hours) before scrubbing off with a sponge or cloth

Skip the Hassle and Hire Professional Cleaners

Many modern homes feature multiple types of floors. We also offer advice on cleaning wooden floors, baseboards, and various other surfaces. Cleaning a house takes a lot of effort, and your time is valuable. Dirty Grout is here to help if you’d rather spend your time doing what you enjoy

5 Reasons to Disinfect Your Floors After Water Damage

Why Disinfect Your Floors?

It’s the worst when you have water damage in your home. You need to figure out where to start, which can be overwhelming, but to disinfect your floors after water damage is an important step that can help prevent mold growth, bacteria, and viruses from taking hold.

disinfect your floors after water damage

1.   Mold

Mold is a common problem after water damage; it can grow in as little as 48 hours. There are several types of molds, but regardless of which type is present, the presence of mold on your floors can have serious consequences for your health.

Mold spores are microscopic and float through the air to contaminate any surface they land on. They may be hidden under other debris or carpeting, so if you have water damage in your home, it’s important to look at all flooring surfaces with a high-powered flashlight before disinfecting.

Mold causes allergies and respiratory problems in some people who come into contact with it. It can cause infections in infants, children, and people with weakened immune systems. This includes those receiving chemotherapy treatment for cancer or AIDS patients whose bodies cannot fight off infections well due to medication side effects.

2.   Bacteria

If you have a basement or another part of your house that floods often, there could be mold growing on the floor in addition to bacteria. After water damage, bacteria can live on your floors for up to four days. These bacteria can cause infections, allergies, and other problems.

Bacteria can be found in bathrooms, kitchens, and laundry rooms, where you might find water damage. This means that it’s important for these types of surfaces to be disinfected after they’ve been exposed to moisture—but not just any old disinfectant will do!

3.   Viruses

The most common viruses that can survive on surfaces for up to 24 hours are in the blood, stool, and vomit. Viruses like this can cause flu, measles, and hepatitis. They can be transmitted to others through contact with contaminated surfaces, so it’s important to disinfect your floors after a flood or some other type of water damage.

4.   Bloodborne Pathogens

A bloodborne pathogen is a microorganism that can cause disease in humans. Bloodborne pathogens include Hepatitis B, Hepatitis C, HIV, and other conditions. These bugs can be transmitted through blood, semen, and other body fluids such as vaginal secretions or saliva.

It’s important to note that these pathogens can also be transmitted from one person to another via infected needles and syringes. An example is when someone has been stuck by a contaminated needle at work or even in their home and does not know about it until after being injured with the same needle multiple times over many months (or years).

You should always wear protective gear when cleaning up spilled bodily fluids like blood on your floors after water damage. It may contain infectious agents that spread disease if not appropriately disinfected first!

5.   Dust and Debris

One of the biggest problems that come from water damage is the dust and debris that can be left behind. If you don’t remove this dirt, it will cause many health issues for you and your loved ones.

Dust mites are one example of how harmful these things can be. They feast on dead skin cells (the body sheds up to 1/3 pound in dead skin every year) and hang out beds where they feed while we sleep!

These little critters are known to cause asthma attacks in people with allergies or respiratory issues. They also irritate airways and eyes, causing dryness or inflammation around the nostrils, mouth, and throat, making it harder for us to breathe comfortably too!

Conclusion

We hope this blog has helped you understand why it’s so important to disinfect your floors after water damage. If you have any questions, please feel free to contact us. Dirty Grout specializes in cleaning all types of tiles in your home and offers exceptional cleaning services with numerous seasonal discounts, ensuring that your floor looks beautiful while also protecting it from viruses and bacteria.
How to Keep Travertine Tiles Looking Great

Travertine Tiles

If you’ve got travertine tiles as a flooring option in your home, you may be wondering what the best way is to clean the floor so that it maintains its pristine condition and stays free of dust and grime.

There are many do’s and don’ts for keeping your travertine tiles looking great, but we will look at the most important things you need to keep in mind when considering the cleanliness and hygiene of your floor.

Let’s explore the cleaning method in more detail.

Wipe Dust Off The Travertine And Begin Mopping

Before you can begin mopping the floor, you will want to remove all traces of dust and dirt from the travertine tiles, which will yield better cleaning results if you follow the right course of action.

travertine tiles

You can easily sweep the dust into a dustpan and do a ‘preliminary clean’ so your floor is ready to be mopped using the right cleaning solution.

Cleaning the mop is important because you want to ensure that it doesn’t have dust absorbed into it, which can affect the quality of your cleaning job.

Once you wring the mop properly and soak it in the cleaning solution, you are ready to begin cleaning the travertine tiles, which is a simple process that involves starting from the far reaches of the room and making your way towards the middle.

It’s important to keep wringing the excess water out of the mop and to dip it in the cleaning solution frequently, allowing your mop to stay clean after removing the dirt and grime from the edges of the tiles.

Final Cleaning Process

You will want to drain all the dirty water and wring your mop clean after completing the deep cleaning process, allowing you to prepare for the final cleaning process, which involves using fresh water and mopping the floor once again to ensure all traces of dirt have been successfully removed from the tiles.

If you’re worried about streaks forming on the travertine tiles, you can use a dry cloth to wipe the floor and remove any moisture from the surface, leaving behind a sparkly clean appearance.

Other Cleaning Tips For Travertine Tiles

If you’re looking to disinfect the floor frequently because of living with pets and bringing external contaminants from the outside into your home, you might think the best options are bleach or vinegar.

This is wrong, and you should avoid using these cleaning solutions at all costs since they can damage the travertine floor.

Instead, your best bet is to use non-acidic dish soap as the best choice for a disinfectant, which you can add to fresh and warm water and use the cleaning method described above to yield similar results.

Since you’re using soap, you might worry about the floor getting sticky, which is not a problem since you can simply complete the cleaning process with a final, fresh water mop, yielding outstanding results for your travertine tiles.

Hire A Professional

Dirty Grout specializes in cleaning all kinds of tiles in your home and provides excellent cleaning services with many seasonal discounts, making sure your floor looks stunning and stays protected against viruses and bacteria.

Final Verdict

It’s not that difficult to maintain your travertine tiles, but there are some do’s and don’ts that you need to keep in mind since you’re dealing with natural stone, and it can get damaged by using the wrong chemicals.

Doing a bit of research helps, but the cleaning method described above will give you excellent results, restoring the condition of your travertine tiles to their original and brand-new state.

How To Remove Haze Off Tile Floors

When you lay down new tiles on your floor, you want them to look sparkling and shiny. Depending on what material the tile is, you would just love to see your own reflection in it because new tiles are supposed to be just that clean.

However, after the grouting and the fixing process, tiles are often left with a white haze. If this white haze is not removed in time, it could take away from the shine of the tile. To get that shine, you have to get rid of this haze as quickly as possible, so let’s take a look at the haze removal process.

remove haze off tile floors soon

What Causes Haze On Tile Floors?

The haze that accumulates on tile floors happens after the grouting process. Grout is made of cement and other minerals. When the grouting process is underway, this grout is mixed with water, and as the water dries, the minerals and cement are left caked on the surface. During the process, the workers usually scrape off most of the grout from the tile, but as the water dries, only a thin film remains, and this is known as the haze.

How Do You Remove Haze Off Tile?

You can try removing grout using materials you will commonly find in your home, or you can use professional grout haze removers as well.

In the case of home remedies, you can use water and cheesecloth to remove the haze. If this does not work, you can make your own remover with the help of vinegar and water, where you add three parts vinegar to one-part water. Use a soft scrubber to remove the grout when using vinegar because you do not want the scrubber to leave marks and scratches on your new tiles.

You can also make use of a professional-grade grout haze remover. Make sure the remover is gentle to the material of the tile since many harsh chemicals can damage stone and marble. Ceramic porcelain and travertine are much more resilient tile materials.

Before using your preferred remover, remember to dampen the grout haze first, so it comes off more easily than dried haze.

Other than that, remember not to let the grout haze stay in place for more than ten days. You should allow the haze to cure, which would take a maximum of 24 hours, but you should not wait for too long. The haze continues to harden with time and will become more difficult to remove after ten days. Trying this out could even damage your new tiles and make your floor look less than perfect.

Hire Professional Tile Cleaners

The best way to go about cleaning your tiles and removing the haze is by hiring professionals to do the job. The experts at Dirty Grout could be one of your best options for professional tile cleaners who could effectively remove the haze from the tiles without damaging or scratching your tiles. Contact the expert cleaners at Dirty Grout now and have them clean your new tiles so that they are left shiny and reflective, just as they should be!

When Can You Walk On Tile After Cleaning?

Tiles and the grouting between them can accumulate dirt fairly quickly, depending on your living conditions mainly. If you walk over the tiles with dirty shoes, if you spill something, or even if dust accumulates on them, the tiles often need to be cleaned to shine at their original, pristine level. The dirtier the environment is, the quicker the tiles accumulate dirt, like kitchen tiles get dirty the quickest because of all the exposure to food and heat.

tile after cleaning

However, if you hire a professional cleaning service and get your tiles cleaned thoroughly, here is how long you should wait before walking all over them:

When Can You Walk On Tile After Cleaning?

Normally, after a thorough tile cleaning where the tiles and the grout are left sparkling, professional services suggest you should wait at least an hour before walking on the tile. You could spend that hour watching a show, reading a book, or even being out of the house without any worry. In fact, if you have removed furniture from the tile to have it cleaned, you can move that right back after an hour of cleaning as well.

Why Should You Wait Before Walking On Clean Tile?

We’re sure everyone questions why the wait is necessary. The tiles are already sealed in place; it’s not like they will begin shifting or sinking. Also, the water that professional cleaning services use is vacuumed by them as well, so there is only a bit of moisture remaining.

Firstly, these tiles are usually pressure washed with water and other cleaners. Immediately after being cleaned, there is usually a film of water that has accumulated on top of the tile. If you step on the tile while it is still wet, there is a chance that you will leave marks on it, which can build up and make it look less clean and sparkly.

Other than that, when tiles are thoroughly pressure-washed with water, the water tends to penetrate into the grouting and other small openings between the tiles. As the water goes deeper, it begins to weaken the tiles and reactivate the base materials that are holding the tiles in place as well. If you begin putting pressure on the tile immediately, there is a chance that it might shift under the weight. Therefore, you need to wait for it to dry completely before walking on it and placing the furniture back on it.

How Should You Get Your Tiles Cleaned?

You should think of professional cleaning services to clean your tiles if dirt and grease have accumulated on top of them. One such expert cleaning service is Dirty Grout. They help clean the tiles thoroughly and remove any bacteria and viruses from their crevices, leaving your floor perfectly clean and sterile. After using expert tile cleaning services, you will find that your floor is sparkling as if you just recently laid down new tiles! So contact Dirty Grout today and get shiny tiles twinkling in your house again.

Why Hire a Tile Cleaning Service For Your Floors

Most people have dirty shower tiles they cannot clean using a traditional approach, and filth can build up in grout over the years if they fail to address the problem.

It can be a grueling task for many who are just not committed enough to clean their bathroom effectively by themselves and may need to hire professionals to restore their bathrooms to their original condition.

Let’s explore why you’d hire a tile and grout cleaning service.

You Can Avoid Difficult Work

hire a tile cleaning service

Let’s face it; not many people are bothered enough to risk hurting their backs or investing in expensive tile and grout cleaning formulas that need special equipment to use effectively.

By hiring a professional, you ensure that you can sit back and enjoy while the cleaning service is carried out, and you reap the benefits of having a hygienic bathroom.

You are also unlikely to accomplish the same cleaning effect as a professional, who will use professional equipment and safe chemicals to get the job done.

Unless you derive enjoyment from scrubbing your bathroom corners with a toothbrush, you might want to leave the task in the hands of a cleaning professional.

Tiles Stay Cleaner When You Get The Job Done Professionally

You can certainly do a good cleaning job if you use the proper cleaning formulas, and you might think it’s an excellent way to save money if you choose not to hire a professional.

However, people are unaware that cleaning the shower tiles themselves will only yield temporary results, and their bathroom will likely revert back to its original condition sooner rather than later.

Since professionals use expensive equipment that really targets the grout and removes all build-up of dirt, you are likely to enjoy a clean bathroom for much longer.

You do not want to damage the tile’s surfaces by using cleaning formulas you should avoid, making it in your best interests to leave the job in the hands of a professional.

Your Tiles Will Look Brand New

Choosing to hire a professional is even more important for people with decades-old tiles that have seen better days.

You might think that your tiles are ready to be replaced because they’re so filthy, but you haven’t left the task in the hands of a tile and grout-cleaning expert.

If you think you cannot restore your tiles to brand new condition, you should think again.

By choosing a professional cleaning service, you ensure that your tiles last a few years longer and that all stains are removed efficiently.

Most people are willing to pay money if they can restore their bathroom to a brand new condition, and going professional is the best way to achieve this.

Final Verdict

Having a clean bathroom is essential if you want to maintain the hygiene of your home, and it can give a bad impression to your guests if they have to use an unclean bathroom.

You might not want to make the commitment to clean your shower tiles yourself, which is why you should hire a tile and grout cleaning service to get the job done efficiently.

What’s The Best Way to Clean Shower Tiles?

There are many proven ways to clean your shower tiles, and you can do a pretty good job at home that will leave your bathroom looking cleaner than it’s ever been. It takes some effort and the use of cleaning solutions, so be prepared to roll your sleeves up and get ready for the task.

Let’s explore the best way to clean your shower tiles.

Soak Your Shower Tiles

clean shower tiles

Cleaning becomes more manageable if your shower tiles are already soaked in hot water, which you can achieve by letting the hot water run for 10-15 minutes. The pores in the tiles become primed for cleaning, and your cleaning session becomes somewhat enjoyable because the grime and dirt come off quickly.

If you haven’t ever cleaned the shower tiles in your bathroom, you will need this pre-treatment process, so you don’t have to waste energy scrubbing the tiles for too long. If you have a handheld showerhead, you can spray the tiles that do not get soaked, so every surface gets soaked. Wait about 10 minutes before you begin the cleaning process, and begin scrubbing the edges of the tiles to remove any buildup of dirt.

However, if you have filth in your grout, you might not achieve significant results without using a cleaning solution.

Use Vinegar And Baking Soda

A combination of vinegar and baking soda is pretty lethal when it comes to cleaning all remnants of dirt in the grouting. Be sure to soak your tiles in vinegar that you apply from a spray bottle, and leave it to sit for 30 minutes if the traditional approach does not yield any results. The vinegar will effectively target the soap scum and yield much better results than using hot water.

You may want to use a grout brush to really get into the tiles and remove traces of dirt or use a toothbrush if you do not have a grout brush lying around the house. This will achieve the cleaning results you are looking for, but you can make a paste using water and baking soda to take things up a notch. After you’ve made a paste that resembles the consistency of toothpaste, begin applying this to the edges of the tiles where any traces of filth is visible.

You can spray more vinegar to enhance this cleaning effect and may notice a bubbling, which indicates that any nasty grout stains that remain are about to disappear. Begin using a circular motion with your grout brush or toothbrush to target the edges of all the shower tiles and remove any residues that remain.

Once the process is complete and your tiles are sparkling clean, let your shower run for a bit and rinse the tiles thoroughly to ensure there is no mildew formation in the crevices. In rare cases, your shower tiles may be stubborn and require hiring a professional to get the job done thoroughly.

Final Verdict

One of the best ways to clean your shower tiles is by using home remedies so you do not have to unnecessarily use harmful cleaning solutions that will drain into the environment and cause potential damage. Why risk using harmful chemicals when you can get the job done with home remedies?

Try it and see the results for yourself.

What Color Tile is Easiest to Keep Clean?

Whether you are planning to replace the floor in your bedroom, living area, kitchen or bathroom, it is important to know exactly what design, style and color you want to go for. Choosing the perfect tiles for your living space can be an overwhelming task. But once you have made the decision and the floor is ready, the next challenging step is to keep it clean and tidy.

Color Tile Easiest to Clean

Though there are lots of tile options to choose from, make sure to select tiles that are easy to maintain and keep clean. Did you know that some coloured tiles are more difficult to clean compared to others? Well, that’s true. Read on to discover which tiles can be cleaned without a hassle.

The color of the tiles

The color of the tiles you choose can make a lot of difference in terms of cleaning them. The tile color can affect how regularly you need to clean them. While it is a great idea to sweep your floor at least twice a week, tiles in lighter tones are way harder to clean. Keep in mind that cleaning solid-colored is quite difficult compared to multi-colored tiles. The reason is that bold or solid shades fail to hide stains and dust. The best option is to go with floor tiles with some kind of design on them and are multi-colored, especially if you want to spend less time cleaning them. Some great colors include beige, ash grey, and you can even opt for slightly darker shades.

The grout color matters

What many homeowners tend to ignore when adding floor tiles to their abodes is the color of the grout. Believe it or not, but it can make or break the look of your tiles. Wondering what is grout is? Grout is basically the material that helps in filling the space between the tiles. It is important for holding the tiles together and sealing them. If you want to clean your tiles easily, make sure the color of the grout when installing tiles. If you opt for a bright color grout, it won’t be easy to keep it clean. This means you will have to clean your tiles and grout regularly. For instance, you go for beige floor tiles with white grout, which is definitely not a good idea. The reason is that the grout will show dirt very easily and cleaning white grout will take up a lot of your time. If you have kids or pets, consider going for a bit darker shade of tile like a shade of brown with some pattern or design on it.

All Set To Go For Tile Flooring?

Call us now and let us help you with all your tiling woes. If you need help with grout cleaning, we are here to help. Feel free to contact us and learn more about our services.

What’s The Easiest Shower Tile to Keep Clean?

Shower Tile

If you are looking to purchase and install new shower tile or replace your existing ones, you have come to the right place. When buying tiles, most people consider things such as the cost, the look, colors, and so forth. Even though the factors considered are essential, a significant consideration that most people miss out on is which of these tiles would be the easiest to clean?

Cleaning tiles can be hectic, and some tiles require more frequent attention than others. Therefore, we will determine which tiles are the easiest to clean so that you can make a better decision on your next purchase.

shower tile

Vinyl Tiles

Vinyl tiles are pretty easy to clean. These were very popular back in the day but not so much now; however, these tiles are light on the pockets, making them a good choice for shower tiles.

These tiles are easily cleaned by mixing apple cider vinegar with hot water; all you have to do is mop your tiles for a sparkly surface.

Porcelain Tiles

Porcelain tiles have seen extreme demand when it comes to tiling. People prefer these as they offer a modern look and are also relatively easy to clean.

You can find different porcelain tiles, but the easiest to clean tile is the polished or glazed porcelain tile.

You can clean these tiles by sweeping off any extra dust, mopping them with a cleaning solution, rinse with water, and wiping them dry, which will give you the best results.

Ceramic Tiles

These are pretty similar to porcelain tiles but are much lighter on the pockets.

The only issue is that these are a bit tougher to clean than porcelain tiles due to their less porous nature.

However, the price difference can make up for most individuals, making these a good option.

Cleaning these tiles is almost the same as porcelain tiles; the only difference is that you should try to change your cleaning solution frequently as it may leave a cloudy film on your tiles.

Glass Tiles

Another great option is glass tiles. They are easy to clean and offer lots of customization options. They are also resistant to stains, mildew, mold, and bacteria.

The only problem with the tiles is that any contact with the surface will leave marks like your fingerprints. Thus, cleaning these tiles will be more frequent, but it is still easy to do.

You can use vinegar and water for the cleaning solution, spray your tiles, and let them sit for 15 minutes before washing them off.

Summing it up

The tiles listed above are all excellent choices. However, you should choose one depending on your preferences: the look that you want, price differences, the need to clean, etc.

Whichever tile you get, make sure that they are correctly installed and sealed, so you do not have to clean your tiles that often. For proper tiling services, we recommend trying out DIRTY GROUT (Grout and tile professional cleaning). They have a 40% off coupon available on their website, and they offer free quotes. Get yours by calling them at 941-457-4197.